
Native advertising helps publishers reduce banner blindness and register a higher CTR. And the statistics reflect likewise.
According to Statista, the native digital advertising budget is expected to reach $57.25 billion by the end of 2020.
Consumers also prefer native advertising over banners because they don’t disrupt user experience while online browsing. Since publishers can leverage dfp native ads to earn more revenue, Google Ad Manager offers a pretty exhaustive setup for creating and running dfp native ads.
In this post, we’re going to cover how the native ad format in Ad Manager works, advantages of DFP native ads, and their setup.
What Are Native Ads?
When you are delivering a banner, you receive a complete creative asset from the advertiser and you deliver it exactly as you received them from the advertiser.
In the case of DFP native ads, instead of getting a rigid banner that is completely unresponsive towards the content environment that it is placed in, what you will receive is separate components. It’s up to you to organize these components in a way that represents advertiser interests and also blends in well with your website or app.
Right there is a level of unprecedented control for publishers. You take a single set of assets, and you’re able to modify those according to the different screens and different types of content layouts that they’re being shown on.
Google Ad Manager further optimizes native ads for publishers. Since users tend to view brand websites on different browsers and devices, Ad Manager optimizes the layout of native ads accordingly.

When done correctly, native enables better, more effective ad experiences for users, advertisers, and for publishers. On that note, here’s a detailed comparison between display and native ads for publishers.
What Makes Native Ads Serving Different From Banner Ads in Google Ad Manager
When it comes to advertising, Google offers a distinctive approach for native ads as opposed to traditional banner ads. Native advertising, as defined by Google, is all about integration with the web page’s layout, blending seamlessly into the content. In contrast, banner advertising involves advertisers providing a pre-designed, fixed-size ad that is simply delivered to publishers.
Here’s how the two differ:
Banner Advertising
In banner advertising, an advertiser provides a complete ad with a fixed size for placement on a publisher’s inventory. The publisher’s ad server, like Google Ad Manager, receives the ad from a third-party server and serves it without any alterations. Google Ad Manager displays the ad just as it was sent by the advertiser to site visitors.
Native Advertising
In native advertising, the process is more dynamic. A third-party ad server sends various components of the ad to the publisher’s ad server (Google Ad Manager). Google Ad Manager then assembles these components to create an ad that harmonizes with the webpage’s layout, maintaining a natural appearance thanks to native styling. This dynamic approach allows for the delivery of native ads that seamlessly fit into the user’s experience.
In summary, the key difference lies in how native ads are seamlessly integrated into the web page’s content, providing a more organic and user-friendly advertising experience. Banner ads, on the other hand, stick to fixed dimensions and do not blend as harmoniously with the page’s design.”
What are the Main Components of Native Ads?
There are three main components of DFP native ads:
Ad Attribution
In most cases, native ads appear exactly like the content featured on a publisher’s website. This is why it is important for a badge to be attached to a native ad. Ad Attribution is this distinguishing factor that helps website users identify ads amidst other content displayed on a website.
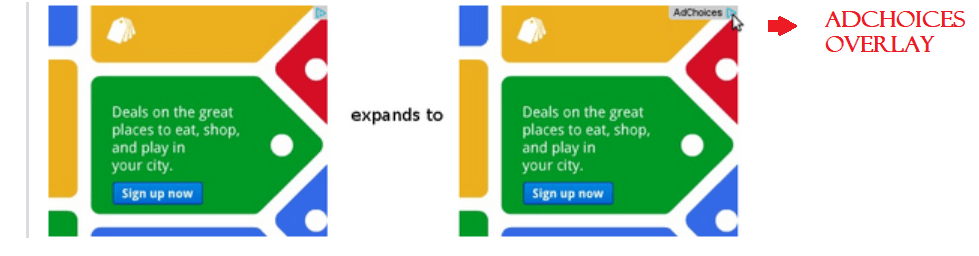
AdChoices Overlay: This should be present in the upper right-hand corner of the native ad. It should be clearly visible. The AdChoices overlay must contain the link provided by advertisers to target consumers.
Advertiser Elements
These are completely dependent on the components that an advertiser provides. Ad Manager has some best practices to follow for the image and text elements of a native ad that we have covered below.
How to Creating and Running Native Ads in Ad Manager?
The entire process of setting up native ads takes three steps:
- Creative native ads
- Creating ad units for native advertising
- Creating line items
Step 1: Creating Native Ads
- Sign in to your Google Ad Manager account.
- Click on Delivery >> Native.
- Click on New Native Ad.
- You’ll get three options to choose from: Guided Design Editor, HTML & CSS Editor, Android & iOS App Code.

We’ll only be covering the options that relate to desktop: Guided Design Editor and HTML & CSS Editor.
Guided Design Editor
This is Ad Manager’s in-built design editor that builds native ads quickly. It serves both Programmatic and Traditional ads. Here’s how to efficiently use the Guided Design Editor:
- Sign in to Google Ad Manager.
- Click on Delivery > Network.
- Click on New Native Ad.
- Select the Guided Design Editor box.
- Further, you’ll be asked to choose either of the two paths: Customizable for in-feed and Google-designed for in-article.
| Customizable for in-feed | Google-designed for in-article |
| Serve both traditional and programmatic ads. | Serve only programmatic ads. |
| Applicable for in-feed native ads. | Suitable for ads present outside the feeds. |
| Build and style a native ad using UI controls. | Pick fonts and colors while Google designs the ad |
Here’s how to define, style, and target your native ad.

Define Ad Settings
- Go to Define Ad Settings and select either Fluid or Fixed. Fluid is recommended as it can be optimized according to the site and page dimensions. Fixed, on the other hand, cannot be changed and has a fixed ad size.
- Select any of the Standard Formats: Content, Video Content, App Install, Video App Install.
- Select an image layout that best fits your website or app.
- Click on Continue.
Style Native Ad
- Click on Preview Width and Preview Height to size your ad according to your preferences.
- Click on Reorder Elements to view or hide the elements you want in your ad.
- If you wish to edit the CSS code, click on Edit Code. Further, click on Validate to ensure that your changes are in accordance with the AdExchange policies.
- Click on Continue.
Target Native Ad
For eventually serving your native ad, targeting on this page should be exactly the same as the targeting of line items.
- Click on Inventory to reveal a dropdown menu.
- Publishers can target according to several metrics including geography, operating system, and others.
- Click on Save and Finish.
HTML & CSS Editor
If publishers use this editor, they definitely enjoy the complete control that they get for fully designing and styling their ads.
Here’s how to navigate the editor and design, style, and target your native ad.
- Sign in to Google Ad Manager.
- Click on Delivery >> Native.
- Click on New Native Ad.
- Select HTML & CSS Editor and click on the Define Ad Settings page.
Define Ad Settings
- The HTML & CSS Editor supports all kinds of fixed and fluid ad sizes. Publishers can choose either of these options.
- Select the Custom format by clicking on either Existing format or New Format.
- Write a Name and Description for your custom native ad.
- Click on Add Variable and then select the kind of settings you want in the variable.
- Click on Continue.
Style Native Ad
- For setting the desired native ad size, use the Preview width option.
- If you’re planning on optimizing native ads on AMP., select Rendering Type. The options under it are: Standard (works across all devices), AMPHTML (serves on standard content but these ads serve best for AMP), and Standard & AMPHTML (Ad Manager serves the standard format on standard content and AMPHTML on AMP).
Target Native Ad
This process is exactly the same as the Guided Design Editor.

Step 2: Creating Ad Units for Native Ads
Once you have created a native ad, the next step is creating an ad unit and line items. Creating ad units for native ads does not have a process any different from the usual in Google Ad Manager. Here’s how you can create an ad unit in Google Ad Manager. Creating native ads in GAM however comes with an exception: you will need to choose the fixed or fluid size under ‘Sizes’.
Step 3: Creating Line Items for Native Ads
While creating line items for native ads in Ad Manager, you will need to select the size depending on the ad request. Here are the three ways to do it:
Ad Exchange Line Items
- Click on Delivery >> Order
- Create a new order or pick an existing one.
- Select Add Line Items and set preference to Ad Exchange.
- Click on Save.
- Click on the Creatives tab of the Ad Exchange line item.
- Click on Automatically generate creative. This will fetch you a single creative which consists of all the ad sizes defined under Expected Creatives.
Programmatic Guaranteed
The process for proposal remains the same as usual, except for one exception:
When you add a new proposed item, the name of the native ad should be entered as the inventory size. You can further add some minor additional changes like Comments in Settings and click on Save.
Google Ad Manager recommends competing native ads with banner ads for maximizing revenue.
Best Practices for Layout Management
The whole point of native is to make ads look and feel like they are a part of the content experience (without disguising them as content). Attribution (ad badge and AdChoices labels) applies to all native ads transacted programmatically. However, unlike AdSense, DFP Native allows you to make slight modifications to the ad badge.
You can download Google’s Native Playbook for advice on how to customize your in-feed units (which require more customization than in-article units) for better UX.
Here’s the compressed list of recommendations:
Grid alignment
Avoid misaligning your in-feed ads by making sure the marketing image aspect ratio and dimensions match that of featured images in content units. Match image width for vertical feeds and height for carousel feeds. Native display images can have an aspect ratio of 1.91:1 (landscape) or 1:1 (square). DFP automatically determines the image size by choosing the closest image aspect ratio that matches the size you set in the CSS.
Font size and typeface
Use the same font size for text elements as you do in your content. If you can’t find the same font, look up the font family and pick one with the closest weight.
Character length
Ads that are too dense become a usability problem, while too much blank space could make it look out of place. Take a look at your character maximums for content units and try to match them in the native ad.
Element and font hierarchy
Put the elements in prominence as intended. The large primary image will get precedence, followed by a square logo (if/when sent by the advertiser) should appear next to the advertiser name or CTA. Fonts and their sizes should work similarly.
Preserve advertiser assets
DFP automatically selects the correct aspect ratio (between landscape and square) of primary images in fluid ads. Make sure you don’t stretch or distort the images.
Include at least one branded asset
Some brand advertisers may not buy inventory if your targeted style won’t let them promote their brand. Put one or more branded elements (advertiser name or logo image) in the layout, and never modify, distort, or obscure these.
You can target (and test) multiple styles for the same inventory segment. Style performance can be tracked by using ‘Native Style’ as a query tool dimension in DFP. Make sure to experiment with styles to find the ones that perform best on your website or app.
Google Ad Manager also provides an in-built A/B testing feature that can help you see which ad layout will perform the best. But don’t forget ad tech market is not short on native ad platforms to try. If native ads are performing well for your inventory, you might want to try some specific native ad platforms for monetization as well.
Frequently Asked Questions
Native ads are promotional content that blends seamlessly into a website or an app’s user interface by using platform-specific UI elements. They are presented within the same views as the existing site or app layouts and can be tailored to match the app’s visual design.
Ad Manager has the capability to seamlessly incorporate the advertiser’s native ad elements into various layouts, which are tailored to the specific device the ad is being displayed on, the page’s content structure, available space, and other relevant factors.
Display ads are purposely designed to draw attention by contrasting with the website or app’s overall user interface and experience. They stand out due to their distinctive colors, prominent placement, and noticeable branding.
On the other hand, native ads are crafted to harmoniously blend with the website’s content. They seamlessly integrate into the page to the point where it can be challenging to distinguish them from regular blog posts or other website content.

Reviewed by Deepak Sharma, Content Editor at Adpushup As part of AdPushup’s content team. Deepak Sharma handles editorial review and content optimization for adtech articles. He focuses on clarity and accuracy to help readers understand advertising technology topics.


")
